Halloween is not just about costumes and candy; it’s also the perfect time to bake something spooky and delicious! This Black Velvet Halloween Cake is sure to be the star of your Halloween party. With its rich flavor, velvety texture, and hauntingly dark appearance, it’s the ideal treat to impress your guests. In this article, we’ll dive deep into how to make this show-stopping cake, including all the tips and tricks to ensure it’s not only visually stunning but also irresistibly tasty.
Why Make a Black Velvet Halloween Cake?
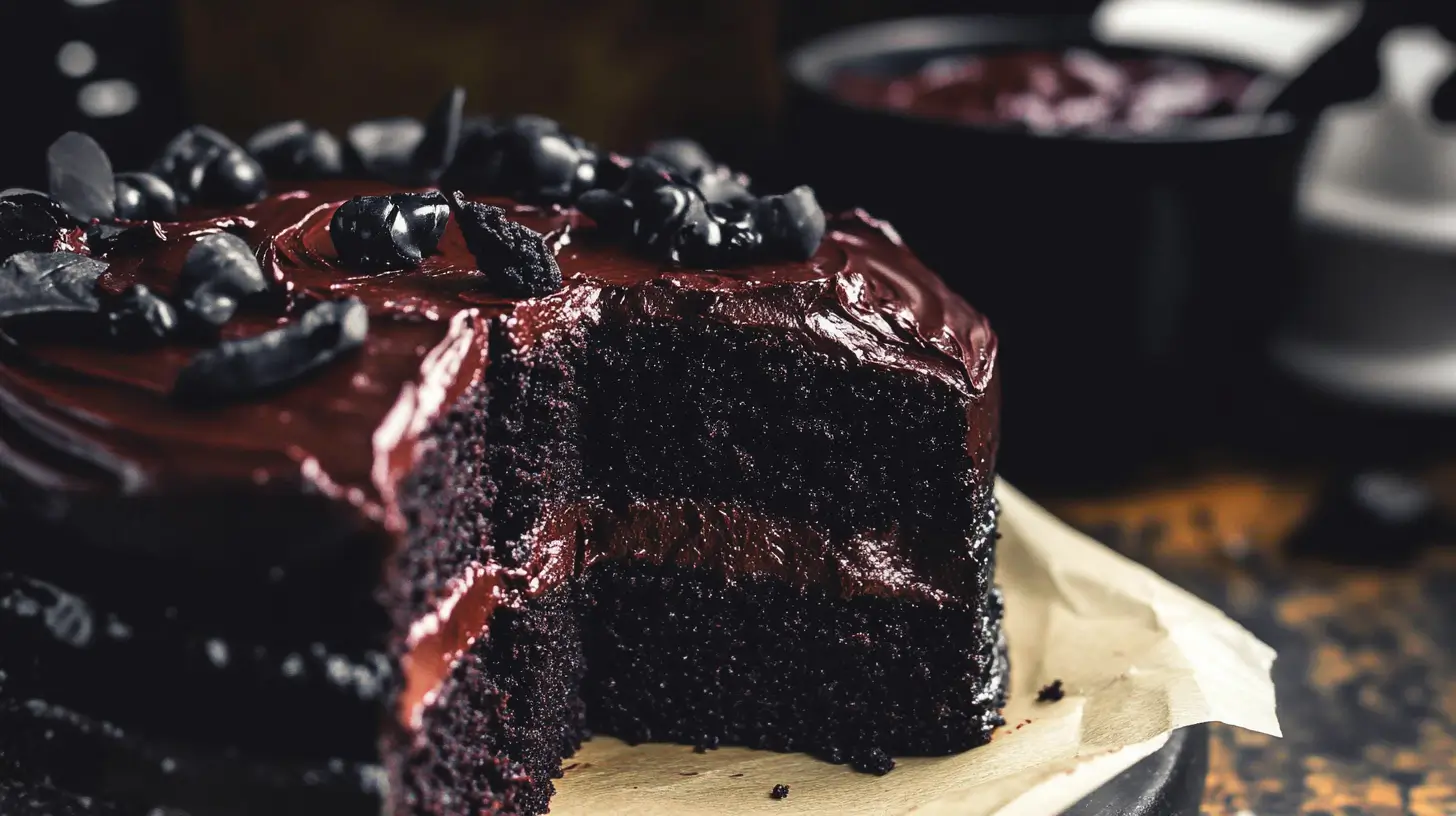
The Black Velvet Halloween Cake stands out from typical Halloween treats. It combines the classic elements of a red velvet cake but with a dark, spooky twist. The rich cocoa flavor, combined with the dark chocolate frosting, gives this cake a unique taste that’s both familiar and exciting. Plus, its deep black color makes it a fantastic centerpiece for any Halloween gathering. Whether you’re hosting a big party or just having a spooky night in, this cake adds a touch of elegance and eeriness to your celebration.
Ingredients for the Perfect Black Velvet Cake
Before we get started, let’s gather everything you need. Here’s a detailed list of ingredients for both the cake and the frosting. Remember, quality ingredients make a big difference in the final product!
For the Black Velvet Cake:
- All-purpose flour: 2 ½ cups
- Granulated sugar: 1 ½ cups
- Baking powder: 1 teaspoon
- Baking soda: 1 teaspoon
- Salt: ½ teaspoon
- Cocoa powder: ¼ cup (preferably dark cocoa powder for an intense color)
- Buttermilk: 1 cup (room temperature)
- Vegetable oil: ½ cup
- Large eggs: 2 (room temperature)
- Vanilla extract: 1 teaspoon
- White vinegar: 1 tablespoon
- Black gel food coloring: 1 teaspoon
- Hot water: 1 cup
For the Dark Chocolate Frosting:
- Unsalted butter: 1 cup (softened)
- Powdered sugar: 3 ½ cups
- Dark cocoa powder: ¾ cup
- Heavy cream: ½ cup
- Vanilla extract: 1 teaspoon
- Salt: A pinch
Decoration:
- Halloween-themed sprinkles or edible glitter
- Optional: black fondant bats or edible eyeballs for an extra spooky touch
Step-by-Step Directions to Craft Your Black Velvet Halloween Cake
1. Preheat the Oven
Preheat your oven to 350°F (175°C). Grease and flour two 9-inch round cake pans. Lining the bottoms with parchment paper is highly recommended to prevent the cake from sticking and to make it easier to transfer later.
2. Prepare the Cake Batter
In a large bowl, whisk together the flour, sugar, baking powder, baking soda, salt, and cocoa powder. This ensures that all the dry ingredients are evenly distributed. In another bowl, combine the buttermilk, vegetable oil, eggs, vanilla extract, and white vinegar. Mix well, then add the black gel food coloring. Stir until you achieve a deep, dark black color.
3. Combine Wet and Dry Ingredients
Slowly add the wet mixture into the dry ingredients. Mix gently until just combined. Add the hot water last, and stir until smooth. The batter will be thin, but that’s exactly what you want—it’ll result in a moist and fluffy cake.
4. Bake the Cakes
Divide the batter evenly between the prepared cake pans. Bake in the preheated oven for 30-35 minutes, or until a toothpick inserted into the center comes out clean. Let the cakes cool in the pans for about 10 minutes, then transfer them to a wire rack to cool completely.
5. Prepare the Dark Chocolate Frosting
In a large mixing bowl, beat the softened butter on medium speed until it’s creamy and fluffy. Gradually add the powdered sugar and dark cocoa powder, mixing on low speed until fully incorporated. Pour in the heavy cream, vanilla extract, and a pinch of salt. Beat the mixture on medium-high speed until the frosting is smooth and fluffy. If it’s too thick, add a little more cream; if it’s too thin, add more powdered sugar.
6. Assemble the Cake
Place one of the cake layers on your serving plate. Spread a generous amount of frosting on top. Place the second cake layer on top and frost the entire cake, including the sides. For a spooky, eerie effect, use a frosting spatula to create smooth, sleek sides or textured waves.
7. Decorate and Serve
Now comes the fun part—decorating! Use Halloween-themed sprinkles, edible glitter, black fondant bats, or edible eyeballs to add a spooky touch to your cake. Slice and serve this masterpiece at your Halloween party. Your guests will be both thrilled and spooked!
Tips for the Best Black Velvet Halloween Cake
1. Use Quality Ingredients
For the best results, use high-quality cocoa powder and pure vanilla extract. These ingredients enhance the flavor and give your cake that rich, luxurious taste.
2. Don’t Overmix the Batter
Overmixing can lead to a dense cake. Mix just until the ingredients are combined to keep the texture light and fluffy.
3. Achieving the Perfect Black Color
Use black gel food coloring instead of liquid food coloring. Gel coloring is more concentrated and won’t affect the cake’s texture. Adjust the amount of food coloring depending on how dark you want the cake.
4. Cooling is Crucial
Make sure the cakes are completely cool before frosting them. If the cakes are even slightly warm, the frosting will melt and slide off.
Nutritional Information & Health Benefits
While this cake is a treat rather than a health food, it can still provide a burst of energy and serve as a mood-lifting delight. Consuming it in moderation allows you to enjoy the indulgence without the guilt.
Nutrition Details
- Serving: 1 slice
- Calories: 450 kcal
- Carbohydrates: 60g
- Protein: 4g
- Fat: 22g
- Saturated Fat: 10g
- Cholesterol: 70mg
- Sodium: 250mg
- Fiber: 2g
- Sugar: 40g
- Vitamin A: 400 IU
- Calcium: 50mg
- Iron: 3mg
Frequently Asked Questions (FAQs)
Yes, you can! You can prepare the cake layers a day in advance. Wrap them tightly in plastic wrap and store them at room temperature. Frost the cake on the day you plan to serve it for the freshest taste.
If you don’t have black gel food coloring, you can use a combination of red, blue, and green food coloring to achieve a dark hue. However, for the best results, using black gel food coloring is recommended.
Store any leftover cake in an airtight container at room temperature for up to 3 days. If you want it to last longer, refrigerate it. Just make sure to bring it back to room temperature before serving for the best texture and flavor.
Yes, you can freeze the cake layers (without frosting) for up to 2 months. Wrap them tightly in plastic wrap and place them in a freezer-safe bag. Thaw them at room temperature before frosting and serving.
If you prefer a less sweet frosting, reduce the amount of powdered sugar and add a bit more cocoa powder. You can also add a pinch of salt to balance the sweetness.
If you don’t have buttermilk, you can make a substitute by mixing 1 cup of milk with 1 tablespoon of vinegar or lemon juice. Let it sit for about 5 minutes before using it in the recipe.
Final Thoughts
This Black Velvet Halloween Cake is a delightful and spooky addition to any Halloween celebration. Its rich, velvety texture and dark, dramatic appearance make it an unforgettable treat. Whether you’re a seasoned baker or a novice in the kitchen, this cake is simple to make and is sure to impress your guests. So, go ahead, put on your apron, and get ready to bake this hauntingly delicious cake!
With these step-by-step instructions, tips, and tricks, you’re all set to create the best Black Velvet Halloween Cake. Happy baking, and have a spook-tacular Halloween!
PrintBlack Velvet Halloween Cake
The Black Velvet Halloween Cake is a dark, moist, and rich cake that combines the classic elements of red velvet with a spooky twist. Topped with luscious dark chocolate frosting and spooky decorations, it’s the perfect Halloween centerpiece.
- Prep Time: 20 minutes
- Cook Time: 35 minutes
- Total Time: 1 hour 15 minutes (plus cooling time)
- Yield: 12 servings 1x
- Category: Dessert
- Method: Baking
- Cuisine: American
- Diet: Vegetarian
Ingredients
For the Black Velvet Cake:
- 2 ½ cups all-purpose flour
- 1 ½ cups granulated sugar
- 1 teaspoon baking powder
- 1 teaspoon baking soda
- ½ teaspoon salt
- ¼ cup cocoa powder (preferably dark cocoa powder for that deep color)
- 1 cup buttermilk (room temperature)
- ½ cup vegetable oil
- 2 large eggs (room temperature)
- 1 teaspoon vanilla extract
- 1 tablespoon white vinegar
- 1 teaspoon black gel food coloring
- 1 cup hot water
For the Dark Chocolate Frosting:
- 1 cup unsalted butter (softened)
- 3 ½ cups powdered sugar
- ¾ cup dark cocoa powder
- ½ cup heavy cream
- 1 teaspoon vanilla extract
- Pinch of salt
For Decoration:
- Halloween-themed sprinkles or edible glitter
- Optional: black fondant bats or edible eyeballs for an extra spooky touch
Instructions
Preheat the Oven
First things first—preheat your oven to 350°F (175°C). Grease and flour two 9-inch round cake pans. For extra insurance against sticking, line the bottoms with parchment paper. Trust me, this little step makes a big difference!
Prepare the Cake Batter
In a large bowl, whisk together the flour, sugar, baking powder, baking soda, salt, and cocoa powder. In another bowl, combine the buttermilk, vegetable oil, eggs, vanilla extract, and white vinegar. Add the black gel food coloring to achieve that signature deep black shade.
Combine Wet and Dry Ingredients
Now, slowly pour the wet mixture into the dry ingredients. Mix just until combined—don’t overdo it! Add the hot water last and stir gently. The batter will be quite thin, but that’s the secret to a super moist cake.
Bake the Cakes
Divide the batter evenly between your prepared pans. Bake for 30-35 minutes or until a toothpick inserted into the center comes out clean. Let the cakes cool in the pans for about 10 minutes before transferring them to a wire rack to cool completely.
Prepare the Frosting
While the cakes are cooling, let’s whip up that dreamy frosting. In a large bowl, beat the softened butter on medium speed until creamy. Gradually add the powdered sugar and dark cocoa powder, mixing on low speed until well blended. Pour in the heavy cream, vanilla extract, and a pinch of salt. Crank up the speed to medium-high and beat until the frosting is smooth and fluffy.
Assemble the Cake
Once the cakes have cooled, spread a layer of frosting on top of one cake. Place the second cake layer on top and frost the entire outside of the cake. For an eerie, spooky effect, use a frosting spatula to create smooth sides or the back of a spoon to make textured waves. The more dramatic, the better!
Decorate and Serve
Now, the fun part! Decorate your cake with Halloween-themed sprinkles, edible glitter, or even black fondant bats and edible eyeballs. Slice it up and serve at your Halloween party. Watch as everyone’s eyes light up with both surprise and delight!
Notes
- Gel Food Coloring: Opt for gel food coloring instead of liquid to achieve that deep black color without altering the texture of your cake.
- Room Temperature Ingredients: Using room-temperature eggs and buttermilk helps the batter mix together more smoothly, resulting in a softer, finer crumb.
- Storage: Store any leftover cake in an airtight container at room temperature for up to 3 days, or refrigerate it for longer shelf life.
- Make-Ahead: You can bake the cake layers a day in advance. Just wrap them tightly in plastic wrap and store them at room temperature.
Nutrition
- Serving Size: 1 slice
- Calories: 450 kcal
- Sugar: 40g
- Sodium: 250mg
- Fat: 22g
- Saturated Fat: 10g
- Unsaturated Fat: 8g
- Trans Fat: 0g
- Carbohydrates: 60g
- Fiber: 2g
- Protein: 4g
- Cholesterol: 70mg
Keywords: Halloween cake recipes ,Spooky cake ideas, Dark chocolate cake, Halloween party desserts